Another enjoyable list of info for those of you wondering what materials I like to use. Here is a list of my favorite comic making supplies and where you can buy them, in case you want to test them out for yourself! I do most of my shopping on www.dickblick.com, Enjoy!
Ticonderoga Pencils:
Very smooth and dark, these pencils provide you with an excellent visible line when drawing pages. Restatements and sketching go so well due to the heaviness of the drawing lead. And while these go on very dark, they erase easily. These pencils come in a large pack and can really be bought anywhere. Their only disadvantages are their easy smearing along with the constant need for sharpening. I suggest an electric sharpener if you plan to use these for drawing comics.
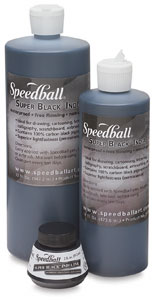
Speedball India Ink:
I have been using various forms of India Ink since I was 13, and Speedball always wins. This is the best ink I have used in my entire artistic career. Among the many others I have played with are Higgins, Black Cat, Faber-Castell, Windsor Newton, Koh-I-Noor, along with several Japanese India Ink brands, Sumi Ink, Animators dye based ink, and probably a few more I have forgotten. Speedball has always been the best for me. It is super smooth, super dark, consistent, waterproof, and stays very beautiful over many years. I suggest buying the quart bottle and refilling a smaller well. It is great stuff; give it a try!
Chromatemp White paint
White paint or white out is one of those things I struggled with years while making comics. Nothing was good enough; I would always have cracking, fading, yellowing, the white would not cover the ink, the paint would get moldy, ect ect. This paint has proven to fix 90% of all of these problems. White paint is one of those things that comic artists are very picky about in my experience. Almost no 2 artists use the same correction fluid. I have been using this for a number of years now and it has proven very good. I recommend it, but do not believe it is the only good white for comics out there.

Faber-Castell Pitt Artist Pens
These pens are filled with India Ink, which makes them extra special. They create beautiful clean lines and reproduce fairly well. If you dislike traditional tools such as nibs or brushes, these guys are the way to go. I have seen people make some incredible stuff with just a set of these pens. There are some disadvantages however: these pens are pricey, sometimes 14$ for a set of 4. Also they have a tendency to fade after being erased over so you may have to redraw your thin lines a few times to make sure they show up.

Koh-I-Noor Rapidograph Pens
The Rolls Royce of ink pens, Koh-I-Noor’s are an incredible invention. They feature a refillable ink well that can use whatever ink you like. Their lines are beautiful, smooth and very very dark. And like the before mentioned luxury car, these require heavy maintenance and cost quite a bit. After owning my own set for years, I have learned to clean these very well. (Going to town with alcohol and cotton swabs on a disassembled pen) While these cost a lot, I would recommend purchasing one just to see if you like it. Also, the packaging will say only to use Koh-I-Noor ink in the pens; you can just ignore that.

Speedball Nibs
Again, Speedball makes an excellent product. The nibs pictured below are the primary ones I use for drawing, but are not the only ones they manufacture. Blick’s website has numerous other nibs, including flat tips and very long fat tips. You can draw almost any type of line you want with a full set of Speedball nibs. Their weakness is stress. Using these on a daily basis, especially the thin small ones, will result in extensive wear; even more so if you are heavy handed like me. Luckily for you, these are very cheap and a few packs of nibs will last months at a time. I usually toss mine when the tip begins to split from wear.

Canson Foundation Bristol Boards:
In my experience the paper you draw your comics on is the most important aspect of the process. Good paper can help you along in making pages look great, but low quality paper will kill even the best lines and inking. Canson’s foundation series is incredible paper. Do not be fooled by the name, there is nothing “student grade” about this paper, it is thick, super smooth, clean with no bleeding and holds up under stress. I have been using this for years and have never had a bad batch. The ink sits on top of the paper like water on glass and dries super dark with crisp edges. Great stuff!

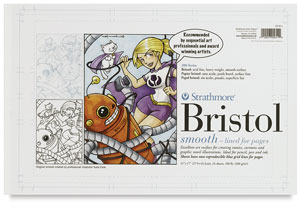
Strathmore Sequential Comic Boards:
Another winner. Strathmore’s comic boards are really smooth and sturdy pages that will really make your inking pop out. While not as thick as Canson, this paper is still worth the money. Also you can get them pre-ruled with comic board lines. These are cheaper and come with more pages, so if you are looking to save money, this is a winner.
Circle Templates
Cirles are a pain to draw, that’s where these come in. I would recommend buying a wide variety of these things to choose from. We have around a half dozen at home, all of which get used.

Wescott C-Thru Ruler
The perfect ruler for any art piece. Measurements are easy to read and the clear plastic makes it easy to follow your lines. The one big problem with these is their fragile nature. We have 3 of them, 2 of which are wrecked. These are VERY sensitive to heat and break or warp without much effort. Still, the advantages outweigh the problems and I will always keep one or two of these in my studio.
![]()
Wescott Metal Ruler
This one here is ideal for drawing ink lines. This ruler features a cork bottom that raises the metal slightly so nibs won’t drag on the paper when drawing lines, thus preventing smearing. Also, unlike the clear rulers, these are bulletproof. They are very hard to damage and last a long time. I have 2 of them, one 18 inches and one 24 inch ruler. Both are used daily.

In addition to this stuff I have mounds of other supplies, but these are the ones that get used the most. I would also suggest getting:
Paper towels: for cleaning nibs. brushes and general messes
Brushes: watercolor brushes with synthetic sable hair are my favorite
Erasers: grab a bunch of them, different colors, hardnesses and styles, stick with the ones you like the most
Masking tape: get this from the dollar store, can be used to masking areas to ink or just keeping your paper from moving
Artbox: any box will do, but I love having one with pockets and spots for each material. Still, anything you like can be your artbox
Old jars: get something sturdy, old glass pickle jars are awesome. These are for cleaning brushes and pens while you work.
Scissors: you’ll need to cut your paper at some point
Rubber Cement: you screwed up and ruined a comic panel, cut out a new one and paste over it with this!
Compass: for drawing custom circles
Toothbrush: dip it in ink or white paint create cool effects in your comics. (just don’t brush your teeth with it after)